
Over the Sink Dish Rack: Width, Height, and Faucet Checks
An over the sink dish rack must fit the sink, faucet, counter supports, wall cabinets, and the dishes you actually wash at the same time. Measure the inside span and overall width separately, then check faucet movement, cabinet height, counter contact, load distribution, drainage, assembly, and cleaning access.
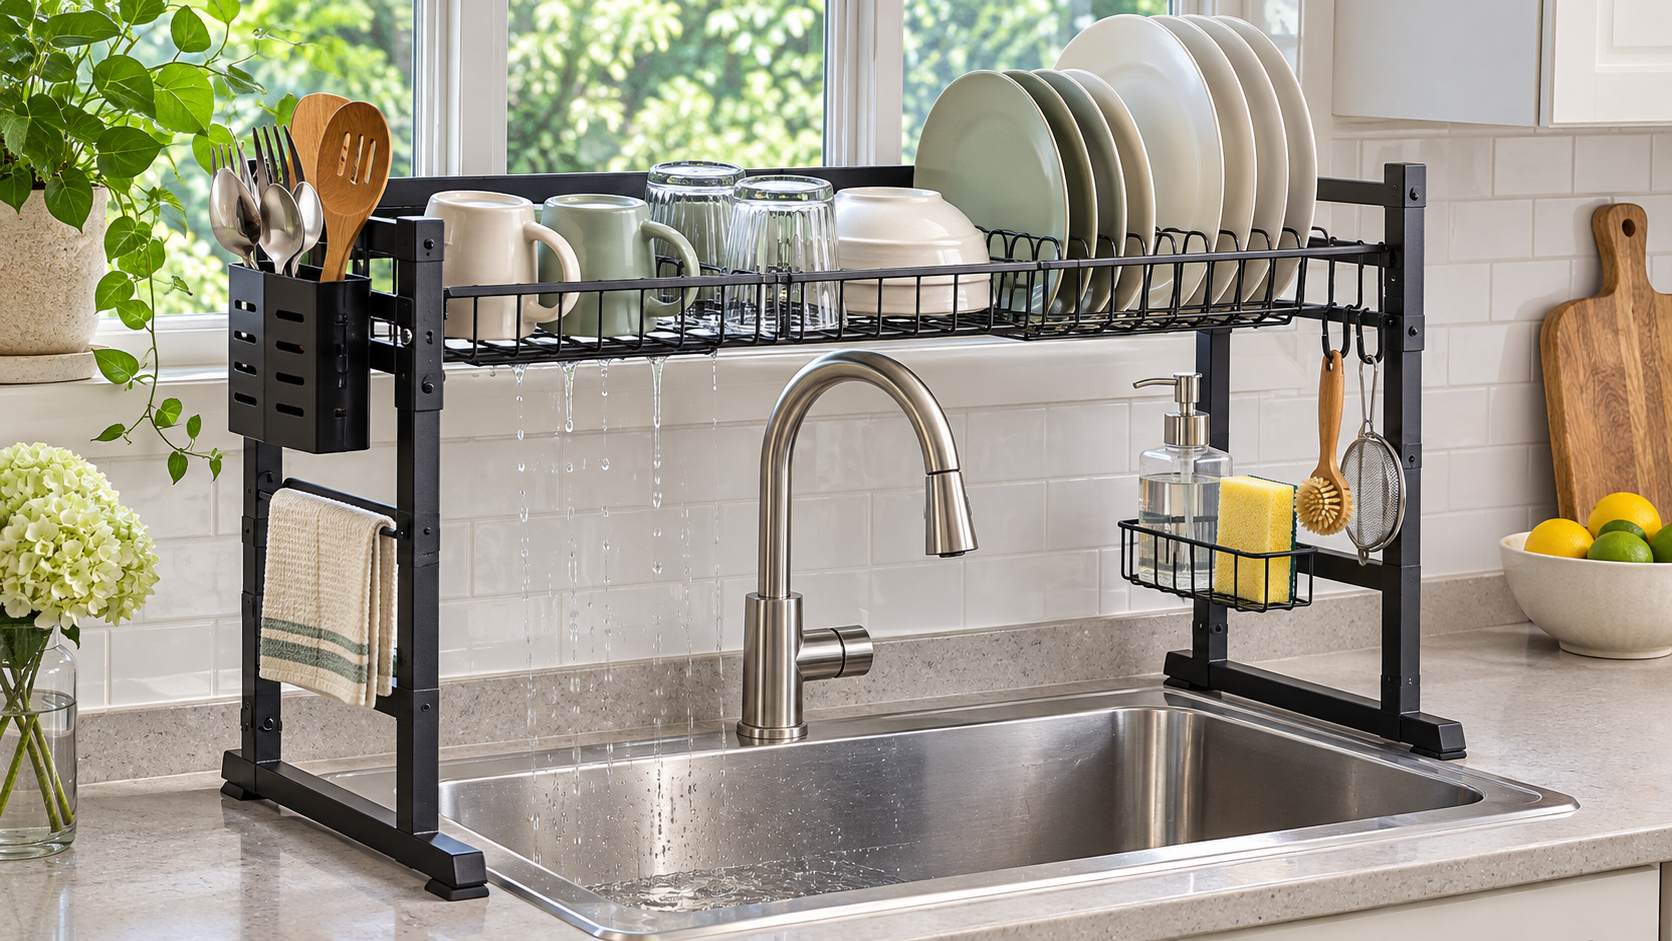
This guide covers bridge-style racks that stand on the counters at both sides of a sink. Roll-up mats and in-sink baskets solve different problems. A tall rack can create useful vertical drying space, but only when it stays stable and leaves the sink usable.
Measure the support points, not only the sink bowl
Measure from the flat counter surface on one side to the flat counter surface on the other. Then measure the sink’s outside width, backsplash distance, faucet height, faucet swing, soap dispenser, sprayer, cabinet bottom, and any window trim. The rack feet must land fully on stable surfaces; they should not balance on a rounded sink rim or caulk bead.
USDA food-safety guidance warns that the kitchen sink can spread contamination to food and utensils. A rack above the sink should be removable enough to let you clean and sanitize the sink and the rack contact points. Water dripping into the basin is convenient, but it does not replace cleaning the sink after raw-food preparation.
| Measurement | Where to measure | Why it matters | Failure to avoid |
|---|---|---|---|
| Inside span | Clear distance between the two support frames | Must straddle the sink and faucet zone | Frame collides with faucet or bowl |
| Overall width | Outside edge of both feet or suction pads | Must fit on flat counter surfaces | Feet sit on sink rim or caulk |
| Height | Counter to top shelf plus tallest dish | Must clear cabinets, lights, and window trim | Plates hit cabinet or block view |
| Depth | Front-to-back footprint and shelf depth | Must not block backsplash or prep edge | Rack crowds handwashing and faucet controls |
Nine buying checks for an over the sink dish rack
1. Draw the full sink elevation
Record counter-to-cabinet height, faucet top, faucet swing, sprayer route, soap dispenser, window latch, and the tallest plate or cutting board. Adjustable width does not solve a height conflict. Draw the side view as well as the front view so you can see whether shelves sit above the faucet and whether dishes will hit upper cabinets.
2. Separate inside span from overall width
Listings may advertise an adjustable width without clearly stating whether it is the frame opening or the outside footprint. Find both. The feet need enough flat counter on each side, including any suction cups or stabilizer pads. Do not count a sloped sink rim, flexible caulk, or narrow trim as structural support.
3. Check every faucet movement
Turn the faucet through its full arc, pull out the sprayer, operate side handles, and imagine removing a tall pot. A shelf or utensil cup can fit when static yet block normal movement. If the rack has removable modules, confirm that relocating them does not unbalance the frame or drip water onto the counter.
4. Compare stability features
Look for cross-bracing, locking adjustment, nonslip feet, suction cups, and a level support surface. Adjustable telescoping bars should lock without relying on friction alone. Load the rack gradually on arrival and keep heavy items low and centered. Do not use a shelf as a handhold or exceed the exact model’s distributed load rating.
5. Match slots to your dishes
Measure plate diameter and thickness, bowl shape, mug handles, cutting boards, knives, utensils, and lids. Wide decorative plates may not fit narrow slots. A large published capacity can count small plates and cups that do not match your collection. Choose the modules that solve your daily wash load, not the largest accessory list.
6. Preserve the sink’s main jobs
The rack should still allow handwashing, rinsing produce, filling pots, washing a large pan, and cleaning the basin. If every task requires removing wet modules, the design may not suit the kitchen. Leave a clear zone for raw-food cleanup and avoid letting clean utensils touch the sink or splash area.
7. Inspect drainage and drip points
Water should fall into the basin rather than collect in cups, seams, or counter contact points. Check utensil holders, knife slots, glass hooks, and shelf wires for drainage. Wipe standing water from feet and backsplash. “Stainless” descriptions do not guarantee every fastener, coating, or weld will resist corrosion under constant moisture.
8. Plan cleaning and disassembly
USDA recommends cleaning and sanitizing the sink after food preparation. Make sure the rack can be lifted or partly disassembled so the basin, backsplash, feet, suction cups, and frame joints are reachable. Check whether removable trays and holders fit the sink or dishwasher and how long coated metal should remain wet.
9. Verify model, hardware, and recalls
Match the exact frame size, finish, fastener set, load rating, and assembly guide. Marketplace listings may combine several widths or tiers. Search CPSC recalls and inspect for sharp wire ends, loose welds, unstable fasteners, or missing feet before loading dishes. Request replacement hardware rather than improvising screws that change the frame geometry.
Sink and rack measurement worksheet
- Width: sink outside width, inside span, overall foot width, and flat counter landing on both sides.
- Height: faucet, tallest dish, rack top, cabinet bottom, light, shelf, and window latch.
- Depth: backsplash, faucet handles, sprayer, prep edge, and handwashing zone.
- Dishes: plate diameter and thickness, bowls, mugs, pans, boards, lids, knives, and utensils.
- Stability: locking bars, cross-brace, feet, suction cups, distributed load, and heavy-item position.
- Cleaning: sink access, removable modules, drip points, joints, drying, and corrosion inspection.
These related TrendIssue guides help keep the sink functional before and after the rack is installed.
- A Small-Space Dishwashing Routine That Keeps the Sink Usable — match rack capacity to the daily flow of dishes
- Portable Dishwasher on Wheels: Measure Before You Buy — compare a larger dishwashing solution with hookup and storage needs
- Under Sink Storage Ideas for Cleaning Supplies — keep sink-cleaning supplies accessible without crowding plumbing
Do a dry fit before loading dishes
Assemble and test the rack while the sink is empty and the return packaging is intact.
- 1. Inspect parts: Confirm frame sections, feet, screws, cups, shelves, and instructions match the exact model.
- 2. Dry fit: Set the empty rack in place and check full foot contact, level, faucet movement, and cabinet clearance.
- 3. Light load: Add cups and small plates evenly, then test the faucet, sprayer, and sink access again.
- 4. Daily load: Add the heaviest normal items low and centered without exceeding the published limit.
- 5. Clean and reset: Remove modules as needed, wash the sink and contact points, dry the frame, and inspect joints after the first week.
Common mistakes and tradeoffs
Measuring the sink bowl only: The feet and adjustment hardware determine whether the rack can actually stand safely.
Ignoring the tallest plate: Cabinet clearance can disappear as soon as a cutting board or dinner plate is loaded.
Loading one side first: Uneven weight can twist an adjustable frame or reduce foot contact.
Assuming all metal is rustproof: Coatings, welds, screws, and trapped water still need inspection and drying.
Blocking sink sanitation: A rack that cannot move enough for cleaning can turn convenience into a hygiene problem.
Frequently asked questions
How do I measure for an over the sink dish rack?
Measure the sink outside width, the required inside span, the rack’s overall foot width, flat counter landing, faucet movement, cabinet height, depth, and tallest dish.
Can it hold pots and pans?
Only within the exact model’s load rating and slot design. Heavy items should stay low and centered, and some racks are intended mainly for plates, cups, and utensils.
Will stainless steel rust?
Stainless steel resists corrosion but is not maintenance-free, and not every component may be the same material. Dry standing water and inspect fasteners, welds, and coatings.
Is draining into the sink hygienic?
It keeps water off the counter, but the sink and rack still need cleaning. USDA notes that sinks can spread contamination after food preparation, so preserve access for cleaning and sanitizing.
Sources and fact-checking
- USDA Food Safety and Inspection Service: The Kitchen Sink and Food Safety
- U.S. FDA: Food Code
- U.S. Consumer Product Safety Commission: Recalls & Product Safety Warnings
Fact-check completed November 16, 2026. Product specifications, prices, manuals, and recall status can change, so verify the exact model before purchase.




댓글 0
첫 댓글을 남겨보세요.