
Countertop Ice Maker: 9 Checks for Cleaning, Speed, and Fit
A countertop ice maker is useful only when its real output, cleaning routine, and cabinet clearance fit the way you will use the kitchen. Compare first-batch time separately from daily production, confirm whether finished ice stays frozen, and inspect every water-contact surface before paying for extra ice shapes or app controls.
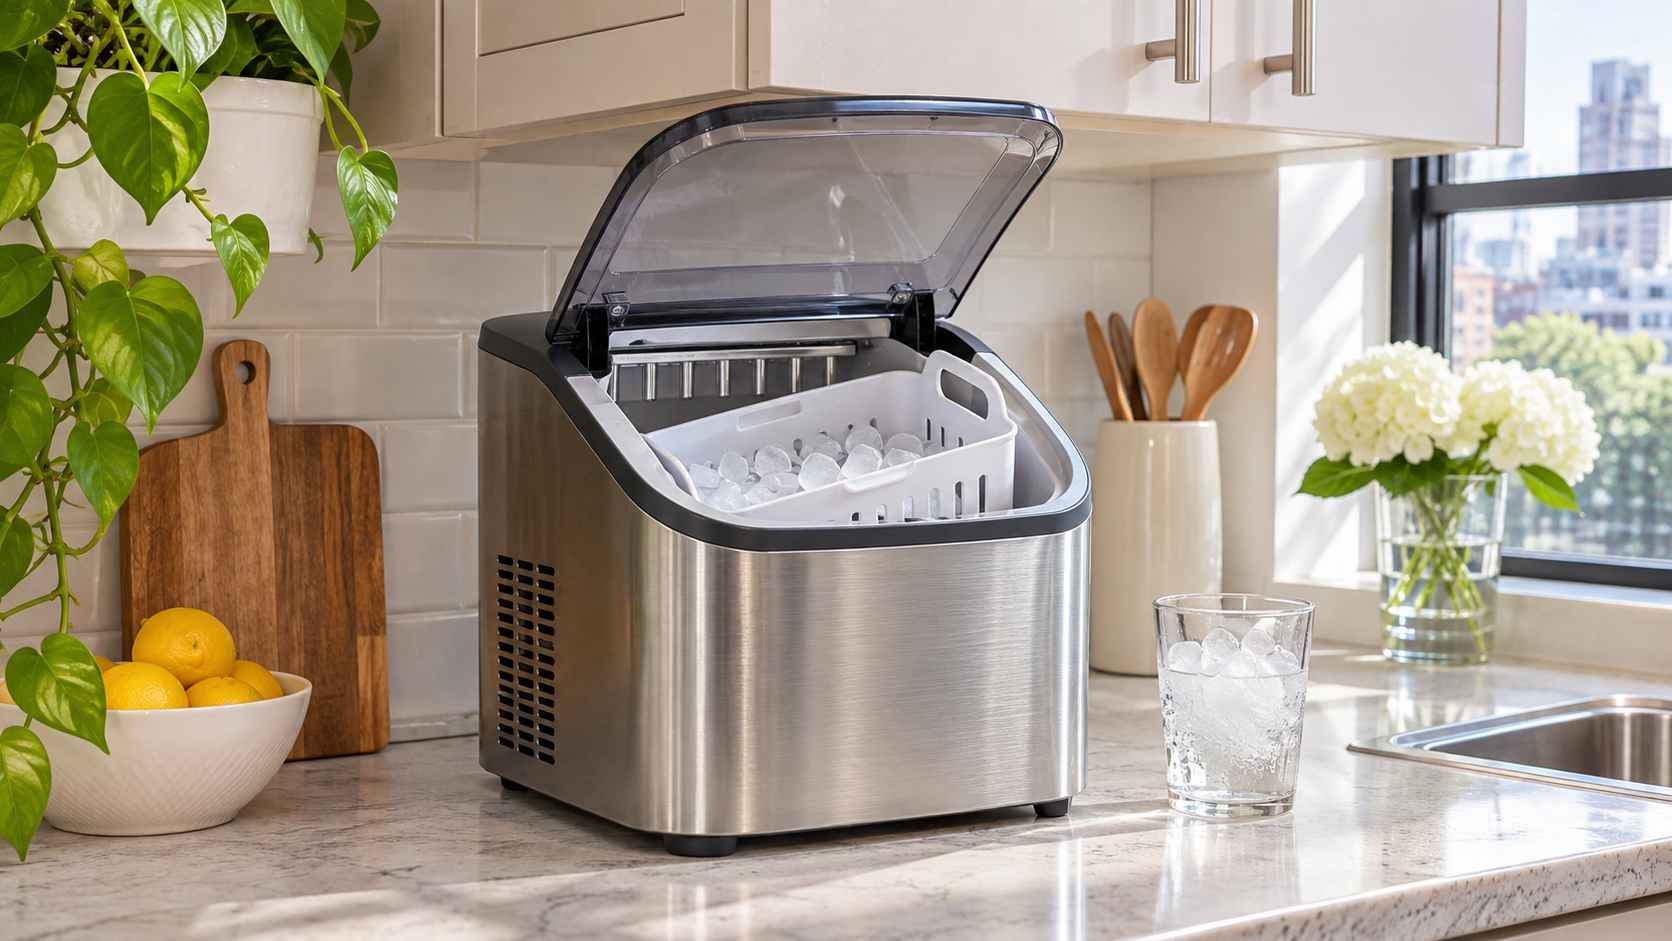
This guide is for portable machines that make ice from a manually filled reservoir. They are not miniature freezers. Many models drop ice into an insulated basket where it eventually melts and returns to the reservoir, so storage and transfer plans matter as much as production speed.
Separate production, storage, and sanitation
Start by estimating when and how much ice you actually need. A short first-cycle claim can sound impressive but may produce only a small handful. Daily-pound claims are usually based on continuous operation under specified room and water temperatures, with the basket emptied as needed. Compare batch weight, basket capacity, and the work required to move ice to a freezer.
Ice is food. Use potable water and keep the reservoir, basket, scoop, drain path, and any tubing clean according to the exact manual. FDA food-safety rules for commercial ice emphasize safe water, clean food-contact surfaces, and prevention of contamination. A home machine is different from commercial equipment, but the same basic decision is useful: if a wet surface cannot be reached, drained, and dried, maintenance will be harder.
| Claim or feature | What it means | What to measure | Common misunderstanding |
|---|---|---|---|
| First batch time | Time until the first small batch drops | Batch size and conditions used | That the basket will be full that quickly |
| Pounds per day | Maximum continuous production under stated conditions | Your daily need and transfer frequency | That the machine stores that amount frozen |
| Basket capacity | Amount held before a full sensor stops production | Usable basket volume and scoop access | That ice will remain frozen indefinitely |
| Self-clean cycle | Automated water circulation program | Manual steps still required before and after | That no wiping, draining, rinsing, or drying is needed |
Nine buying checks for a countertop ice maker
1. Measure counter and lid clearance
Record width, depth, height, rear ventilation space, and the extra height needed to open the lid or remove the basket. Check the distance to an outlet and sink. A machine that fits under a cabinet but cannot open fully is not a good fit. Leave the airflow clearance required by the manual rather than pushing the appliance against a backsplash.
2. Compare real batch output
Look beyond “ice in minutes.” Find the weight or piece count of one batch and the time for repeated cycles. If the seller states only a 24-hour maximum, estimate how often you would need to empty the basket to reach it. Room temperature, incoming water temperature, selected ice size, and ventilation can change cycle time.
3. Understand that the basket is not a freezer
Most portable countertop units do not keep finished ice permanently frozen. Ice can soften, clump, or melt back into the reservoir. Decide whether you will serve it immediately or transfer it to a freezer. If freezer storage is part of the plan, price a bin and allow time for fresh ice to harden before combining multiple batches.
4. Inspect every water-contact surface
Check product photos and the manual for reservoir corners, ice basket, scoop, drain plug, water line, evaporator area, and removable parts. A self-clean button may circulate water but cannot guarantee that residue is removed from every surface. Prefer a design you can drain completely, wipe, rinse, and air-dry without turning a heavy machine upside down.
5. Plan water filling and draining
Confirm whether the reservoir must be filled with a pitcher, under a faucet, or through a side tank. Check the maximum fill line and whether spills can reach controls or the outlet. For draining, measure the path to the sink and verify the drain plug is accessible without moving the entire machine to the counter edge.
6. Compare ice type with actual use
Bullet, nugget, and clear-style ice differ in texture, melt rate, production method, price, and maintenance. Do not pay for an ice shape because it looks premium in photos. Choose based on drinks, chewing preference, noise, cleaning burden, and replacement-part support. Never assume soft ice is safe for chewing for every person.
7. Price noise and heat in a small kitchen
Compressors, pumps, fans, and falling ice create intermittent sound. A quiet fan specification does not capture the clatter of a batch dropping. The machine also releases heat, so keep required ventilation and consider whether it will run beside a desk, sleeping area, or open-plan living room.
8. Verify controls and sensors
Check what happens when the basket is full, water is low, power returns after an outage, or a sensor is blocked by cloudy ice. Confirm whether alerts can be muted and whether a cleaning reminder is a timer or an actual sensor. Simple controls with clear manual instructions are often more useful than app features.
9. Check exact model support and recalls
Record the full model number, electrical rating, warranty, seller, and manual. Search that identity in the CPSC recalls database. Confirm replacement baskets, scoops, side tanks, filters, or drain plugs are available for the exact model rather than assuming a visually similar part will fit.
Countertop ice maker checkout worksheet
- Space: machine footprint, lid-open height, rear and side clearance, outlet, and sink route.
- Output: first-batch size, repeated-cycle time, daily maximum, and expected daily use.
- Storage: basket capacity, whether ice stays frozen, freezer bin, and transfer schedule.
- Cleaning: drain access, removable parts, reachable wet surfaces, self-clean steps, and drying position.
- Operation: water fill method, full and low-water sensors, noise, heat, and restart behavior.
- Identity: model, manual, warranty, seller, electrical label, and current recall result.
These guides help you protect limited counter space and keep the machine from creating a new kitchen bottleneck.
- A 15-Minute Weeknight Kitchen Reset — build draining and wipe-down into an existing routine
- How to Set Up a Small Rental Kitchen — choose a counter zone without permanent changes
- A Power-Outage Food Plan for Apartment Renters — plan what happens to stored ice during an outage
Run a supervised first-week test
Use the return window to verify output, drainage, and cleanability rather than waiting until scale or odor appears.
- 1. Unpack and identify: Photograph the rating label, save the manual, wash removable parts as directed, and inspect the drain plug.
- 2. Measure one batch: Use the recommended water, time the first three cycles, and weigh or count the ice produced.
- 3. Test storage: Leave one batch in the basket for the normal serving interval and observe melting, clumping, and sensor behavior.
- 4. Complete a full clean: Run any automated cycle, then perform the manual draining, rinsing, wiping, and drying steps.
- 5. Check support: Save the exact replacement-part and warranty contacts while the seller listing is still available.
Common mistakes and tradeoffs
Buying by 24-hour pounds alone: That number may require continuous emptying and favorable test conditions.
Assuming the basket freezes ice: Most portable units make ice but do not store it like a freezer.
Treating self-clean as maintenance-free: Water-contact surfaces still need manual inspection, rinsing, draining, and drying.
Ignoring lid and cabinet clearance: A machine can fit on the counter but remain impossible to refill or clean in place.
Using an unknown model without recall research: Exact model identity matters for safety notices and replacement support.
Frequently asked questions
Does a countertop ice maker keep ice frozen?
Many portable models do not. Finished ice sits in an insulated basket and can melt back into the reservoir. Check the exact manual and plan freezer transfer if long storage is needed.
How fast does a countertop ice maker work?
First-batch time is only one part of performance. Compare the amount in each batch, repeated cycle time, basket capacity, and the conditions behind the daily maximum.
How often should I clean it?
Follow the exact manufacturer schedule and clean sooner if residue, scale, odor, or long idle periods occur. Drain, rinse, and dry water-contact areas as the manual directs.
Can I use any water?
Use potable water and follow the model instructions. Water mineral content can affect scale and taste, while additives or nonapproved cleaning chemicals can damage the machine or contaminate ice.
Sources and fact-checking
- U.S. FDA: Food Code
- Electronic Code of Federal Regulations: Sanitation Controls for Water, Ice, and Food-Contact Surfaces
- U.S. Consumer Product Safety Commission: Recalls & Product Safety Warnings
Fact-check completed November 16, 2026. Product specifications, prices, manuals, and recall status can change, so verify the exact model before purchase.



댓글 0
첫 댓글을 남겨보세요.