
Refrigerator Thermometer Placement in a Small Fridge
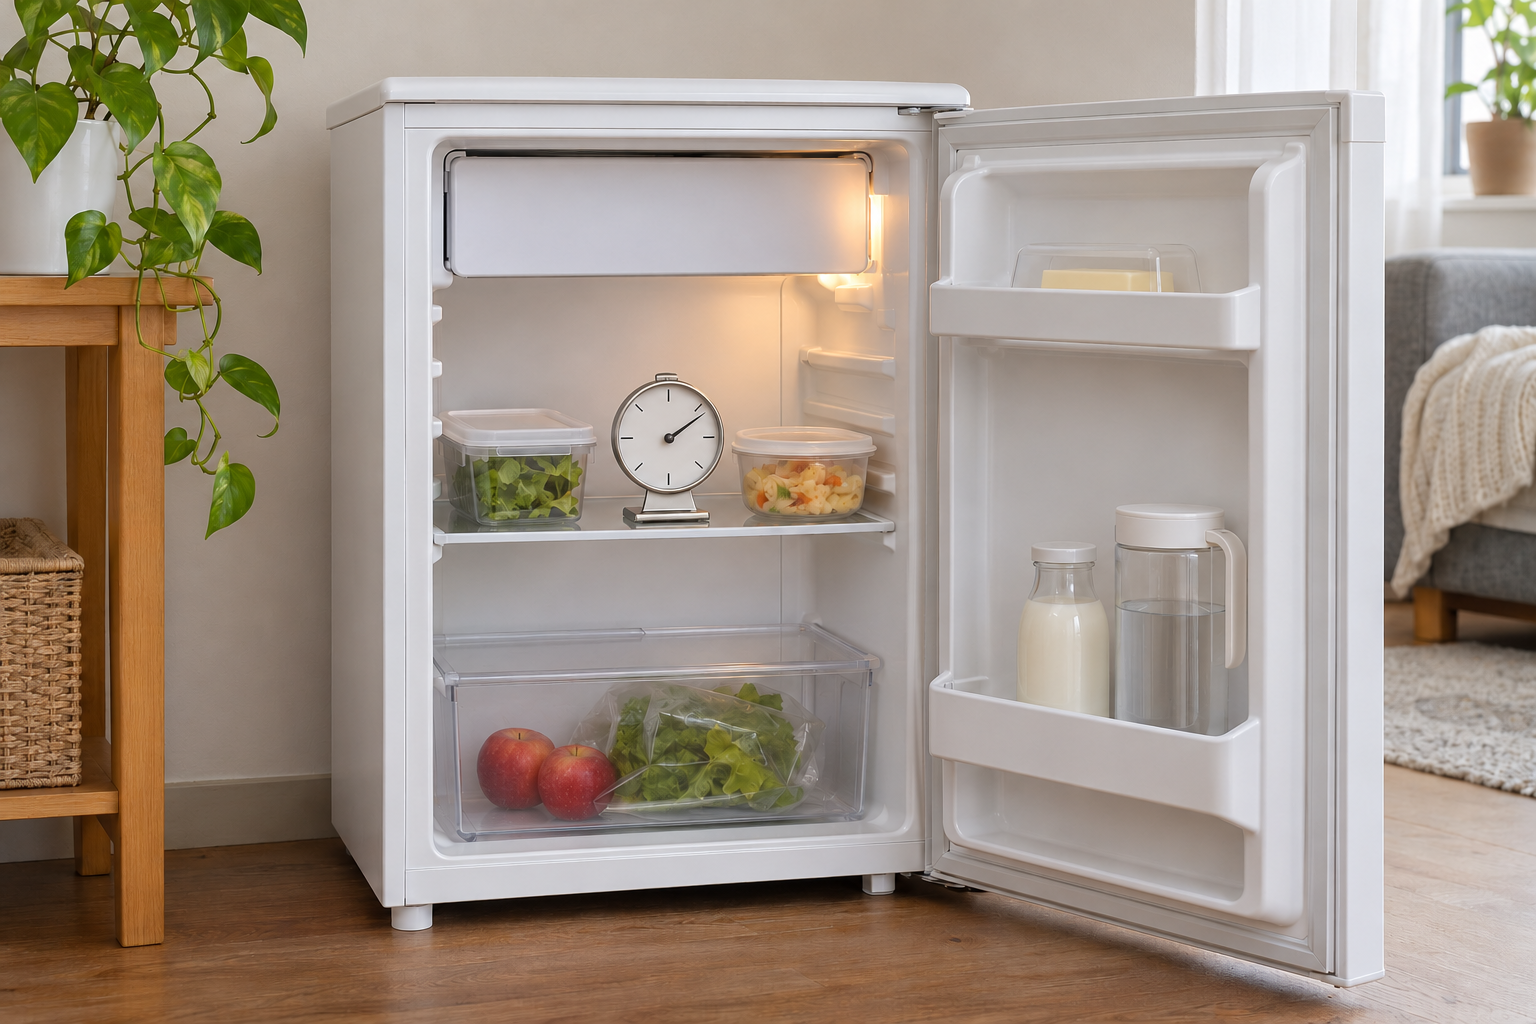
Good refrigerator thermometer placement starts with an open, readable spot in the main food compartment, not whichever corner has room left. In a small fridge, choose a shelf position where groceries will not cover the device, follow its instructions, and leave time for the reading to settle. A middle-shelf location is a practical starting point, not proof that every shelf is equally cold.
The goal is to learn whether the space holding your food is staying cold enough. Buying a more elaborate thermometer will not solve a blocked air vent, an overloaded shelf, or a device that gets moved behind a carton every day.
Decide what you want the reading to tell you
A basic appliance thermometer helps you monitor conditions inside the cabinet. A numbered refrigerator dial is a control setting; it is not necessarily a measurement of the actual compartment temperature. A separate thermometer gives you something useful to check after loading groceries or changing that setting.
The PNNL refrigerator-temperature guide recommends a thermometer in both the refrigerator and freezer. It describes a refrigerator range of 35 to 40°F and a freezer target of 0°F or below. Do not apply the refrigerator range to a tiny freezer compartment without first checking whether that compartment is intended to store frozen food.
This article addresses household food storage. Medicine, vaccines, laboratory materials, and other temperature-sensitive products may require different equipment and monitoring instructions.
Reserve a small, permanent landing spot
Before buying, measure the available shelf depth, the vertical opening above it, and the distance to the door when closed. Include the thermometer’s stand or hook, not just the diameter of its display. A large dial is not useful if it forces food against the cooling surface or prevents the door from closing properly.
Pick a place visible during a normal quick check. Keep the sensing area exposed as its manufacturer directs. Avoid pressing the device against a rear wall, burying it under produce, or setting it directly in the path of a cold-air outlet merely to obtain a reassuring number.
A middle shelf often offers a workable starting position because it is easy to inspect. The official PNNL guidance specifies a spacious area rather than one universally correct shelf. Refrigerator designs vary, particularly among compact models with exposed cold plates or small internal freezer boxes.
| Placement option | When it may fit | What to check |
|---|---|---|
| Shelf-standing thermometer | Solid shelves with a clear landing area | Stand depth, tipping risk and display visibility |
| Hanging thermometer | A compatible wire rack | Hook opening, clearance below and door movement |
| Remote-sensor design | You need an external display | Approved sensor location and cable route; never assume the door seal can accommodate a cable |
| Second monitoring position | One area seems warmer | Allow stabilization at each location; do not compare a settled reading with a freshly moved device |
Give the first reading time to mean something
PNNL advises allowing the thermometer to sit for 5 to 8 hours and avoiding frequent door openings. Putting it in the fridge, opening the door repeatedly, and checking after a few minutes is not the same test.
- Read the thermometer instructions and select its intended mounting position.
- Arrange the refrigerator normally, leaving vents clear.
- Place the device where you can find it again without unloading the shelf.
- Record the location and starting time, then minimize door openings during the check.
- Read it promptly and write down the result before moving anything.
Do the first check during an ordinary period, not while unpacking a large grocery order. If the household shares the fridge, leave a short note asking people not to relocate the thermometer. Your comparison will be less useful if the device changes shelves between readings.
Do not immerse a thermometer unless it is designed for that
PNNL notes that some sources recommend a glass-of-water method. That does not mean every freestanding digital display or dial can be submerged. Water can damage equipment not intended for immersion. Check the thermometer’s instructions before using any liquid-buffered method, and keep the measurement method consistent when comparing results.
Investigate warm areas without chasing every fluctuation
One spot cannot describe every part of a crowded refrigerator. If a particular shelf is a concern, repeat the check there after allowing the same stabilization period. A second thermometer can make comparisons easier, but first compare the devices together so you know whether their readings differ.
Keep brief notes: shelf, time, reading, recent grocery loading, and any control adjustment. Avoid repeatedly turning the control colder after every door opening. PNNL advises recording the reading and rechecking after 12 hours following an adjustment.
If the refrigerator remains too warm, inspect for blocked vents and a door that does not close cleanly. Follow the appliance manual before cleaning coils, defrosting, or moving the unit. In a rental, send the property manager a factual description of the readings and conditions rather than attempting an appliance repair.
Choose features you can maintain
Compare readable markings, a stable mounting arrangement, the measurement range, and the manufacturer’s stated accuracy. A low price is less helpful when the display cannot be read at the angle your shelf requires. A digital model also brings battery access and replacement requirements; a connected model adds setup and notification settings.
Check whether minimum and maximum readings are available and how they are reset. A retained maximum may reflect an earlier door opening rather than the present temperature. Follow the manual when interpreting the display, and do not treat a current cold reading as a complete history of food storage.
For a cramped cabinet, start with a small-refrigerator reset so the device has a dependable home. Use a separate pantry inventory to avoid buying unnecessary shelf-stable backups that compete for kitchen space.
FAQ
Can I keep the thermometer in the refrigerator door?
Do not choose the door solely because it is convenient. Start with a spacious location in the main compartment and follow the thermometer and refrigerator manuals. A door reading describes that location, not the whole cabinet.
Does a thermometer reading prove leftovers are safe?
No. A reading does not establish how long food was previously warm or how it was handled. Food-safety decisions require time and temperature history, not appearance or one current measurement.
Should the thermometer touch food containers?
Use the intended sensing arrangement. For an air-reading device, leave it exposed as directed rather than wedging it between containers. A probe-based method may have different instructions.
Do I need a second thermometer for a mini-fridge freezer?
A separate thermometer avoids repeatedly moving one device between compartments. First confirm that the compartment is rated for your intended frozen-food storage and select a thermometer with the appropriate range.
Sources and fact-checking
Reviewed November 19, 2026. PNNL: Check Refrigerator Temperature supports the temperature targets, stabilization advice, vent warning and adjustment interval above. Shelf selection and the note-taking workflow are editorial planning advice, not a claim that one position is correct for all refrigerators. No product was hands-on tested for this article.



댓글 0
첫 댓글을 남겨보세요.