How to Organize a Basic Emergency Supply Area in a Small Apartment
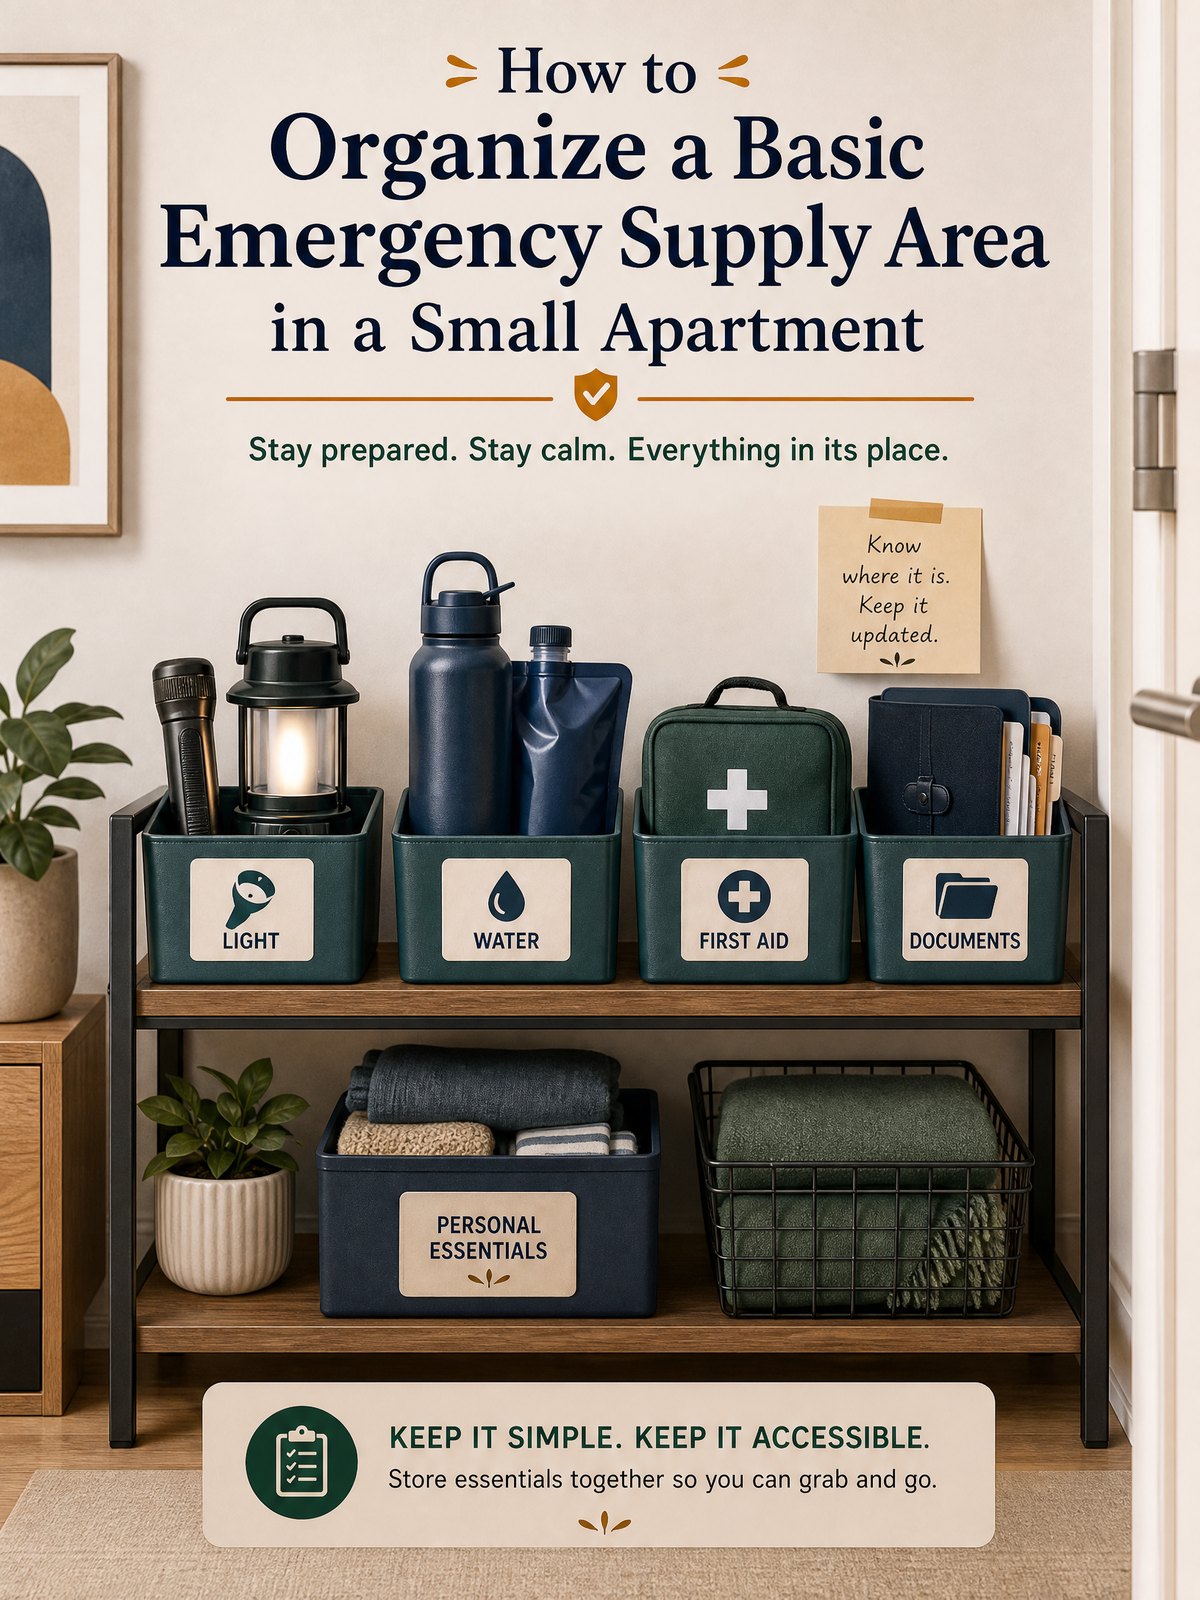
In a small apartment you often don’t have a single garage or coat closet to dedicate to emergency supplies. The challenge is to create a compact, visible zone for essentials that you can reach quickly without blocking exits, walkways, or everyday storage you need.
This article shows a simple layout and step-by-step process to build a small emergency supply area that stays out of the way of daily living but is accessible when you need it. Wherever the guidance touches on building fixtures, manufacturer instructions, or your lease, follow the product label, manufacturer instructions, and your rental agreement or local authority as appropriate.
Start with the real constraint
Space and access are the primary constraints in a small apartment. You cannot reserve a whole closet for emergency gear without disrupting daily routines, and you must avoid placing items where they will impede an exit path. Make that limitation the organizing principle: prioritize compact, layered storage and keep the zone along a route you already use rather than creating new obstructions.
Another constraint is safety of mounted or stacked items. If you secure furniture or hang storage, follow manufacturer instructions and secure top-heavy pieces where appropriate; a practical option is to check the U.S. Consumer Product Safety Commission guidance on anchoring items if you plan to fasten anything to walls or floors. When in doubt, treat anchoring as a step to verify with your landlord or a qualified installer.
At-a-glance plan
| Zone | What to keep | When to access | Quick check signal |
|---|---|---|---|
| Door-adjacent shelf or small wall hook | Day bag with flashlight, phone charger, important cards in a small pouch | Grab for a quick exit or short outage | Flashlight battery test once per season |
| Kitchen cabinet or tote near utilities | Water bottles, easy snacks, can opener, basic first-aid items | Short-term power or water interruption | Check bottle seals and snack expiry every six months |
| Closet top shelf or slim storage bin | Copies of critical records in a waterproof sleeve, spare keys | Needed for evacuation or dealing with agencies | Verify records folder is complete and legible annually |
| Under-bed slim box or low-profile tote | Extra blankets, a compact tool kit, and masks | Prolonged outage or staying in place | Blanket and mask condition check before winter |
Build the system step by step
- Choose a single, compact primary zone near your main exit route but not in the doorway. Practical option: a narrow shelf, wall hook, or the inside of a hall closet door can work without blocking egress.
- Assemble a small grab bag for everyday carry items: a flashlight, a phone charger, copies of ID or insurance cards in a waterproof sleeve. Personal planning approach: tailor the bag’s contents to what you actually use each day.
- Create a secondary supply location for short-term needs (water, snacks, basic first-aid) in a kitchen cabinet or a tote you can lift easily. Label the tote so you don’t need to rummage in low light.
- Designate a secure place for critical documents and records. Ready.gov advises organizing critical household, insurance, financial, and medical records before an emergency and safeguarding them in a secure accessible location; consider a waterproof sleeve or a digitized copy stored with a trusted contact as a practical option to verify locally.
- Place lower-priority bulk items like extra blankets or a compact tool kit in a low-profile under-bed box or a top shelf, so they are available but out of daily traffic.
After you complete these steps, rehearse the action of grabbing the bag and tote once — practice helps you see whether a location actually works in low light and whether any items should move. When the plan requires altering furniture placement or anchoring, follow the manufacturer instructions and consult your lease or landlord before making changes.
Trade-offs to consider
Designing a compact emergency area involves trade-offs between readiness, convenience, and aesthetics; being aware of those trade-offs helps you make choices that fit your living situation.
- Visibility vs. discretion: keeping items visible speeds access but may make your living space look cluttered or reveal valuables to visitors.
- Compactness vs. duration of supplies: a smaller kit is easier to store and grab, but it holds fewer supplies for longer disruptions; consider layering short-term and longer-term storage as a personal planning approach.
- Permanent fixtures vs. renter flexibility: anchoring furniture improves safety but may not be allowed under your lease; verify with your landlord before drilling or fastening anything.
Keep it workable
Maintenance should be minimal: set two calendar reminders each year to check batteries, expiration dates, and the condition of stored items. Replace perishable items as you rotate them into everyday use, and update records when you change important documents or policies. If you digitize records, periodically verify access credentials and that backups work; treat this as a task to verify locally if you share storage with a service.
FAQ
How much water should I store in a small apartment?
This depends on how much space you have; a practical option is to keep a few bottles for immediate use and a plan to refill from a secure source if needed. Verify local guidance if long-term water outages are a concern in your area.
Can I anchor furniture in a rental?
Follow your lease and consult your landlord; if permitted, follow manufacturer instructions for anchoring and consider professional installation. If anchoring is not allowed, a personal planning approach is to choose lower, heavier furniture that is less likely to tip.
Where should I keep copies of important documents?
Ready.gov advises organizing critical household, insurance, financial, and medical records before an emergency and safeguarding them in a secure accessible location; practical options include a waterproof sleeve in your emergency zone and a verified digital copy shared with a trusted contact.
Set a single 30-minute session this week to put together your grab bag and mark one storage location on a home map. After that, schedule the twice-yearly checks and you’re done for the year unless your situation changes.
Sources and fact-checking
This guide provides practical editorial guidance. Requirements and safe choices can depend on the product, lease, local rules, and individual situation.
- Ready.gov — Financial Preparedness — Ready.gov advises organizing critical household, insurance, financial, and medical records before an emergency and safeguarding them in a secure accessible location.
- U.S. Consumer Product Safety Commission — Anchor It! — CPSC advises following manufacturer instructions, securing TVs and top-heavy furniture where appropriate, and keeping climb-attracting items away from the top of furniture.
Fact-checked against the linked official resources on August 27, 2026.